Setting Up NannyPay2 Employer Information and Tax Settings
Launching NannyPay2 for the First Time
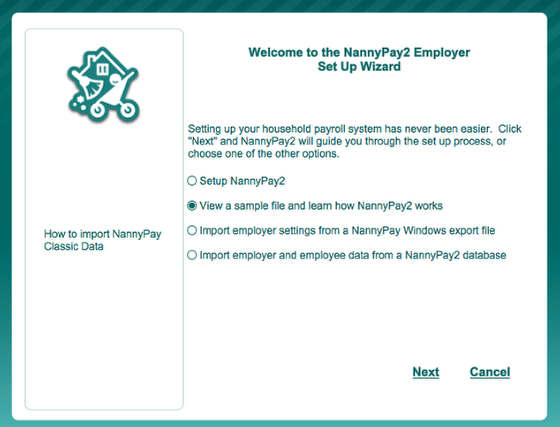
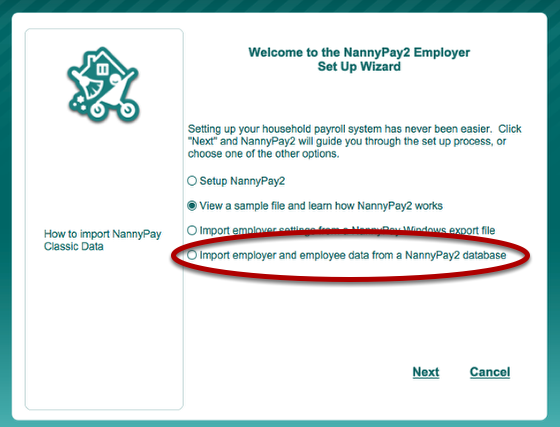
The first time you launch NannyPay2, you will be presented with the Employer Set Up Wizard. By choosing the appropriate option on the first page of the wizard, you may:
- Setup NannyPay2
- View a sample file
- Import employer settings from a NannyPay windows file
- Import employer and employee data from a NannyPay2 database
Setting Up the Employer
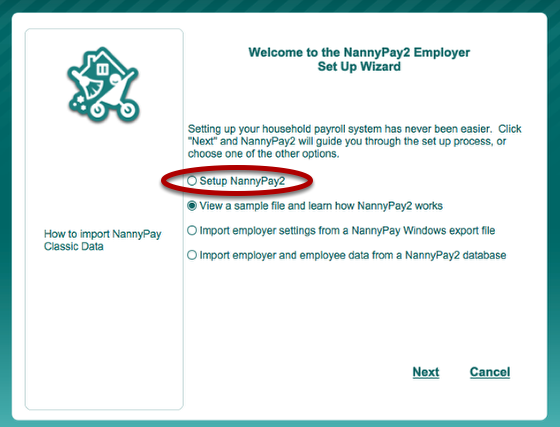
If you select the first option, "Setup NannyPay2," click the "Next" button and move forward through the wizard. Enter the information according to the detailed instructions and information on each page. Click the "Back" button to move back. You may also exit the wizard at any time; however, NannyPay will not work unless you set up an employer and at least one employee. If you exit the Employer Set Up Wizard before finishing, the next time you run NannyPay, you will be presented with the wizard again. When you arrive at the last page of the wizard, check the "Add Employees" check box and click "Finish". You will then be presented with the Employee Set Up Wizard.
Importing Employer Settings from a NannyPay Windows File
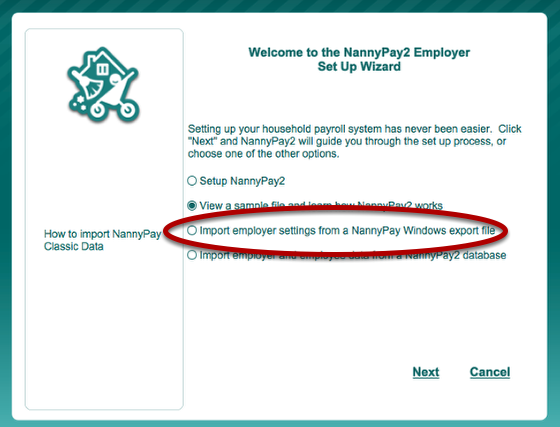
Importing your Windows NannyPay classic data is a two step process: (1) Separately export your employer, employee, and transaction data from the Windows software; and (2) import your data into NannyPay2 starting with this step. Click here for detailed instructions.